A kitchen makeover for less than $350!
- Vicki Liston
- Apr 13, 2019
- 3 min read
Not all room makeovers need to be crazy expensive. Smart shopping, some creativity, using what you already have, and elbow grease can be combined to get a lot of bang out of only a few bucks. Take this kitchen, for example...


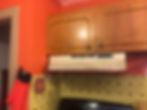
I don't even know what was going on with this wall. Or that light switch with the ruffle, OMG...

For LESS THAN $350, we turned it from scary Halloween orange with terribly outdated cabinetry to a more calming, modern masculine space. $343 to be exact! Here's where the money went:
First the ceiling and walls: Can of ceiling paint - $18 Mistint paint for the walls - $9 Most of the room had cool, old custom baseboards.except the dining room area. We couldn't find a match anywhere so I made some with a ¾" thick board, a stop, and some caulk.

¾" thick boards and stops for entire area - $18 Mistint paint for the trim - $9 Then, the cabinets - OMG. We pulled that awful trim off, removed the tiny nails, and filled them with wood filler. Then a MAJOR sanding effort. The sanding took off the varnish, the dated finish, and left us with bare wood. The outsides got one color, the insides a lighter shade, and all shelves were finished off with new contact paper. New hardware finished off the gorgeous new look!


Two cans of mistint paint - $9 each Clearance cabinet pulls - 80 cents each New hinges for all the cabinets - $28 (specialty hinges with coupon) Contact paper - $5 per roll (2 rolls total) The kitchen had a ceiling fan.and then a few feet away, the dining area had another ceiling fan. Since this small area really didn't need two fans, we replaced the one in the kitchen with a light fixture.

Fixture from Restore - $20
I love how the backsplash turned out! The colors pull the entire kitchen together and it was so easy to install! That craziness of orange and yellow with old sticky things on it...GONE. And let's never discuss that ruffled light switch next to the stove again.

Peel and stick 12"x12" tiles - two boxes for $60 total.
We skimcoated the countertop with Henry Featherfinish for a concrete look without the mess or heavy lifting. Three coats of concrete with sanding in between each coat and a couple coats of 3X Polyurethane to seal and protect it.

Henry Featherfinish - $14 3X Polyurethane - $7
Make your own concrete countertops with this tutorial: https://www.youtube.com/watch?v=zsHc0VBIzIc&t=1s
We finished out the room with a statement ceiling focal point. The walls and cabinets shouldn't get all the fun! We used the cabinet paint on the trim and rosettes so everything matched.

Peel and stick wallpaper - $30 Trim from Restore - $2 Rosettes (already had 3) purchased the 4th for $1.80.
Make your own statement ceiling focal point with this tutorial: https://www.youtube.com/watch?v=gw4fcfJG7j8
The pantry was full of unused space - too deep shelves, no organization, no view of what you actually had in there.


I pulled out half the depth of the shelving and reused that wood to make wrap around shelves. I also added some additional levels. Now you can see everything you have and there's plenty of space to organize.


Support brackets under new wrap around shelves - $6 Contact paper - $5 Mistint paint - used the same interior cabinet paint so there was no extra cost. Wrap around shelves - reused extra wood from too-deep shelves - no cost
Finally, I created a piece of artwork for the new space by reusing a canvas. I painted over it with the ceiling paint to prime, created a design with free website Canva, traced it on the canvas, then painted it with the cabinet, wall, and trim paints. I think it adequately reflects how I felt about the 'before' version of the kitchen...

New artwork - zero additional cost.
Additional materials used for multiple parts of the makeover- paint rollers, drop cloth, caulk, wood filler, Loctight adhesive, nails, sandpaper, and a couple of quality paint brushes. This all came out to less than $100. We shopped sales and Restore to keep the costs down.
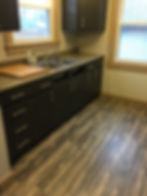
We weren't planning on doing anything to the floors. They were Pergo and we were going to leave them as-is. However, right before we started working on the kitchen, a water pipe burst under the sink. The flooring material was all covered by the insurance claim and we did the work ourselves so there was no out of pocket costs here. A pretty big inconvenience but also perhaps a fortunate accident? The new floor looks amazing with the cabinetry and paint colors!
Cleaning up the flooding:

This was under the Pergo!

MUCH nicer!


