

How to Build an Extra Wide Headboard
- Vicki Liston

- Oct 21, 2022
- 3 min read
An Extra Wide Headboard provides a punchy focal point in a bedroom. Combine that with a hidden shelf and you’ve got a striking piece of furniture that provides a place for lighting, drinks, décor, plants, or cell phones.

You’ll need (do your material shopping on Amazon HERE - affiliate link proceeds are donated to no-kill animal shelters and rescue organizations at no cost to you)
2x2s and 2x4s – for my project’s size, I’m using 4 - 2x2s and 3 - 2x4s. The 2x2s will frame the headboard and the 2x4s will provide extra support and serve as a hidden shelf.

A large piece of plywood, mdf, strand board, pressboard, or other type of large board

A miter saw, safety glasses, measuring tape, a sanding block or sandpaper, a drill, and bits for screws and pilot holes.

Four 2 and a half inch screws, 17- one and a half inch screws, seven L brackets and some small screws that won’t poke through the width of your large board.

Wallpaper – Whether you use peel and stick or more traditional pasted or unpasted, wallpaper on an extra wide headboard is a great way to add visual interest to a room without having to do an entire wall of it. Especially if your style or tastes change regularly.

Spray paint or stain and a drop cloth

And if desired, some sticky felt spots

First, measure for the headboard. My bed is 5 feet across...

and I want the headboard to extend out on each side by an additional 1 and a half feet. So my total desired width is 8 feet.

Since I have a window to contend with, I want my height to stop before the lower molding so my headboard will be 54 inches tall from floor to top.

The legs should extend all the way to the floor but the headboard itself doesn’t. I’m going to use a 4 foot by 8 foot piece of strand board as I can purchase that size off the shelf and won’t have to do any additional cutting to get the headboard to my desired size.
Cut two 2x2s to your height measurement minus the width of a 2x2 so 54 minus one and a half inches is 52.5 inches.

One of the 2x2s will be to the width measurement. Since mine is a full 8 foot wide, I won’t need to cut the top 2x2 at all.
Cut the last 2x2s to your width measurement minus the width of two 2x2s So 96 inches minus 3 inches is 93 inches.

Next, cut the 2x4s – I’ll want the hidden shelf to sit lower than the top of the headboard so I’m subtracting a few inches from my desired height and cutting two 2x4s to that length. The last 2x4 should be the same width as the headboard.

Sand all of the wood with the sanding block or sandpaper until smooth.

Use stain or paint to finish the wood to your desired color.

Allow to fully dry before continuing.

While you are waiting for the wood to dry, apply the wall paper to one side of the board.

Once the wood dries, place the 2x2s on top of the headboard and ensure everything lines up. The longest 2x2 will go along the top, then the two sides pieces under that, and the last piece fits between the legs of the headboard.

Turn the headboard upside down and place the 2x2s in the same spots. Drive the 1 and a half inch screws through the back of the headboard and into the 2x2s to secure. I used five screws along the top, four on each side, and four along the bottom.

Next, lay the 2x4s out so that the longest piece is along the top and the two shorter pieces are legs.

Use two 2 and a half inch screws to secure each piece to its adjoining piece.
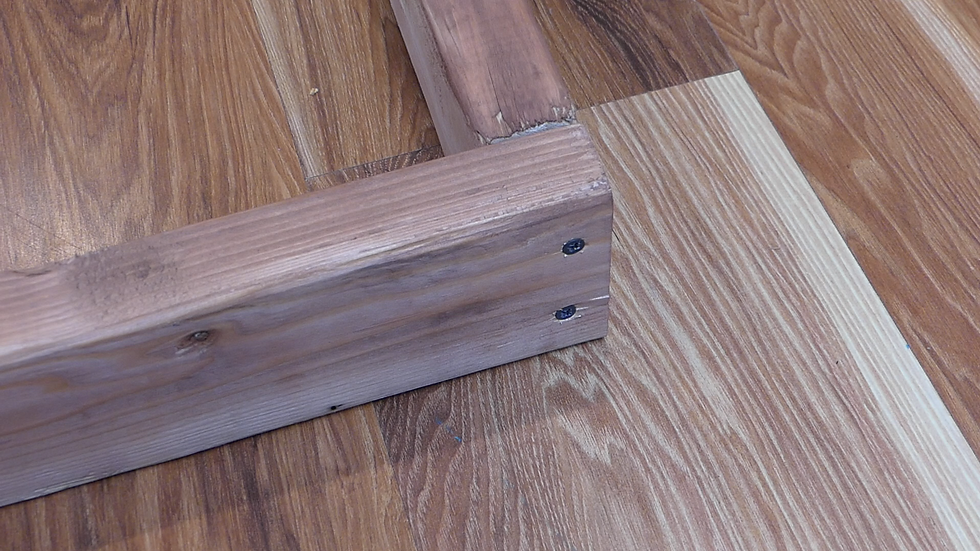
Place the 2x4s behind and up against the back of the headboard. Use the brackets to secure in place. I used two on each of the sides and 3 along the top. I used the screws that came with the brackets for securing into the 2x4 but since my headboard is a half inch thick, I used shorter, half inch screws to secure the brackets to the headboard.

If desired, add felt spots to the back of the 2x4s to protect your walls.

Move the headboard in place behind your bed.
Ensure that you either secure the headboard to your bedframe or secure it to the wall for safety.

Use the shelf for décor, string lights, or as a catch-all for items you might need within reach like phones, remotes, a drink...

...or your favorite eye mask.

Watch the step-by-step video tutorial below! Proceeds from this video and the entire channel are also donated to support rescue animals. Watch, like, share, and subscribe to help raise monthly donations ❤


Hi
I like your website. Have You Considered Selling? I would propose x25 of your monthly earnings.
Thank you
Best Regards
Dennis Demchyna
https://www.facebook.com/profile.php?id=100077635508369