

House Canopy
- Vicki Liston

- Jun 7, 2021
- 3 min read

An extra twin mattress would nicely serve as a cozy reading nook but it’s a little blah and boring. Add some height to the space with an easy to build house canopy.

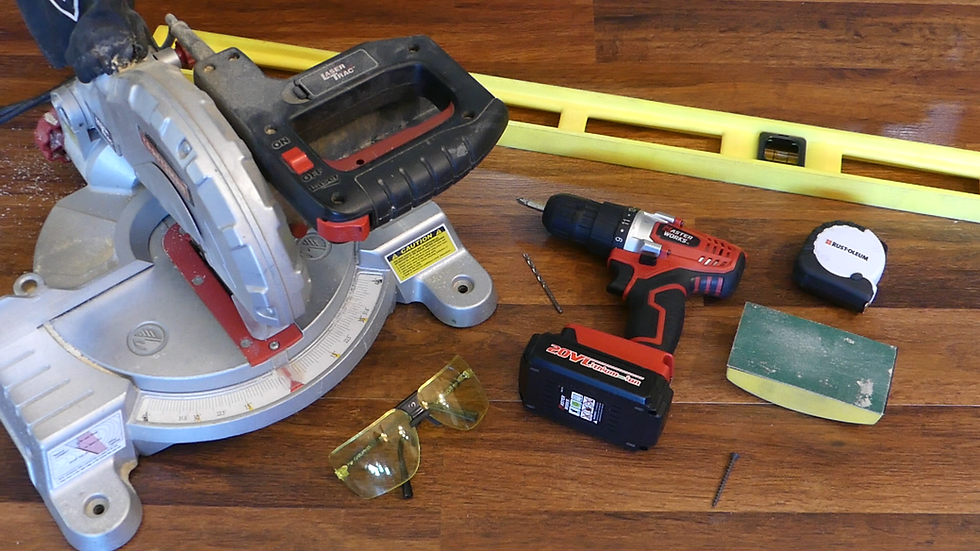
You’ll need (affiliate links generate proceeds which are ALL donated to no-kill animal shelters and rescue organizations. Shop through these links to help raise donations ❤) :
Eight 2x2s and two 1x4s
A miter saw, safety glasses, measuring tape, 2 inch screws, a sanding block or sand paper, a drill with pilot hole and screwdriver bits, and a level.
First, measure the length and width of the mattress and add an inch and a half to accommodate the 2x2s. My final length measurement is 76 inches and my final width measurement is 38 inches.

Cut 2 2x2s at 76 inches and 2 at 38 inches.

Use the sanding block or sand paper to smooth the cut edges and any rough areas of the wood. Do this with every piece of wood as you go.

Lay the 76 inch pieces along the long sides and the 38 inch pieces along the ends. Butt the shorter pieces up to the sides of the longer pieces to create the corners.

Drill pilot holes before securing with 2 inch screws as this will keep the wood from splitting.

Cut 4 2x2s at 48 inches long. Secure vertically next to the corner screws.

Use the level to ensure these pieces are angled straight up and secure with a second screw just above the first.

Cut two 43 and a half inch 2x2s. Set one on top of one end’s vertical pieces.

Drive a screw straight down into each of the vertical 2x2s to hold the end together. Do the same thing for the other end.

Cut one 70 and a quarter inch 2x2 and secure along the back of the frame.

It will screw in to the side of the two rear vertical pieces and under the horizontal top pieces just added.

To make the gables, set the miter saw to make 45 degree angle cuts at one end of each 2x2.

You’ll need two pieces cut at 29 and three fourths inches long and two pieces cut at 28 and a half inches long.

Ensure the measurements are made at the longest part of the angled cut.
I find it easiest to cut the 45 degree angle first, then measure the length, then make the straight cut at the other end.

The shorter 28 and a half inch piece should butt up to the side of the longer 29 and three fourths inch piece.

The two 45 degree angled ends will sit flat on the horizontal pieces already on the frame’s ends.

You’ll be screwing in here to secure the peak.

Reassure your impatient supervisor that the house canopy is almost done.

Drill pilot holes into the 45 degree angled ends. Angle the drill so that the hole will come out of the end of the wood piece and not the side.

Drill a pilot hole and then screw in where the two gable pieces make the peak.

Place a gable on top of the horizontal piece at each end and screw in place.

Cut two 1x4s at 73 and a half inches long. Secure one on each side of the top of the peak.

Create 12 braces. Each should be 8 and three fourths inches long and have 45 degree cuts at both ends.

Secure one brace at each corner where the bottom frame attaches to the vertical 48 inch piece. Secure one end through the vertical piece and the other end through the brace to the frame.

Secure the remaining braces where each of the wood pieces connect to make corners and inside the top of each gable. While the braces reinforce the frame and make it very sturdy, the house canopy is not meant for climbing or hanging on. If you have little ones, make sure they behave safely while enjoying it.


Decorate with cool-burning led lights, sheer fabric, pillows, soft blankets, and anything else to make the space cozy and fun.

And enjoy!

Watch the easy-to-follow, step-by-step video tutorial below. Proceeds from this video and the entire channel are also donated to no-kill shelters and rescue organizations. Watch, like, share, and subscribe to help raise donations ❤


Comments